Re-Fighting Agincourt.
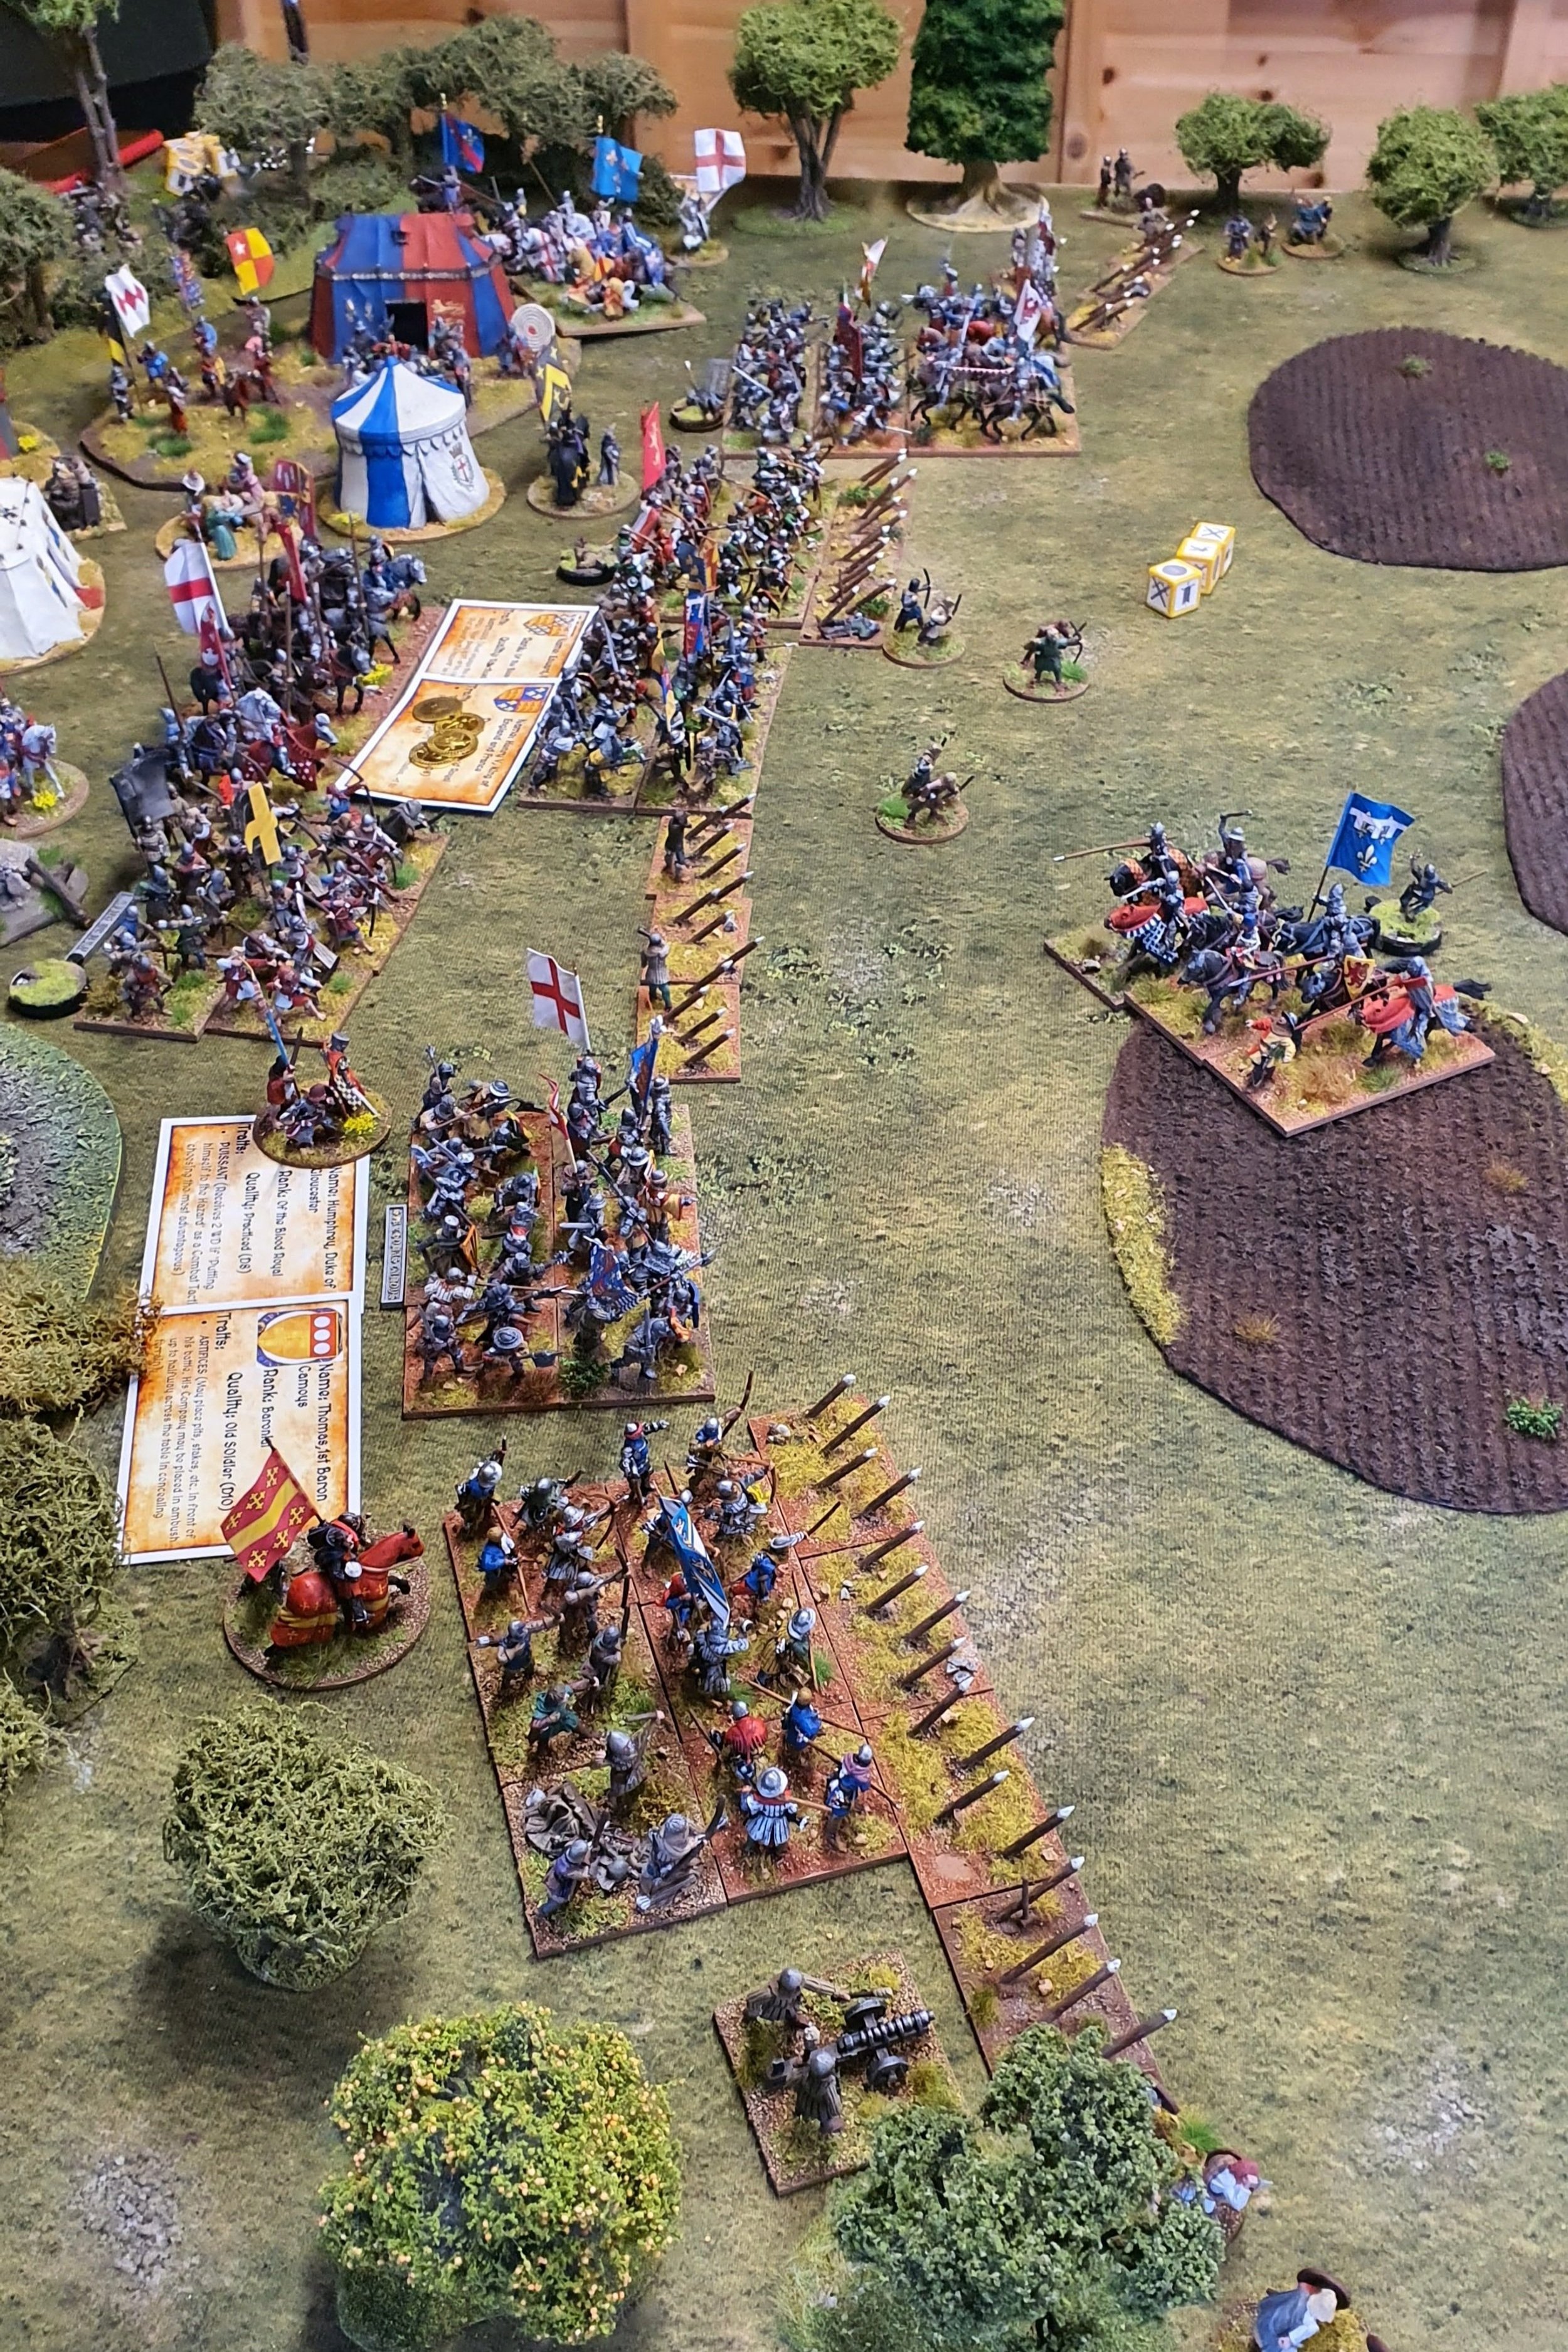
The English line, from a game put on by myself and Gareth Lane (Author’s photo).
Having released the completed* version of my big-battle wargames rules ‘Blood and Horse Droppings’, here are my thoughts on how to stage Agincourt as a wargame, and how to do so using the rules.
(* Not that a ruleset is ever ‘complete’ - I am certain to be tempted to fiddle with them over time.)
Why Agincourt?
To a certain extent, the desire to recreate Agincourt on the tabletop is an obvious one. Of the Hundred Years War battles it is, for an anglophone audience, the most iconic. Thanks to Shakespeare and centuries of myth-making (which started more or less on Henry’s return from the campaign) it has become one of the enduring tales of English victory against overwhelming odds, and of the triumph of the common archer over the noble knight.
The myth of Agincourt should make it a rubbish battle to play out on the tabletop. Either the odds are so overwhelming that no balanced ruleset will give the English a chance to defeat the French knightly juggernaut, or the English archers are inevitably going to mow down the French before they have a chance to come to blows with their English opponents.
In fact, Agincourt was a close fight, and if structured right offers both players a good chance of victory, and one that is not wholly based on pure chance.
So, here’s my take on how to do Agincourt on the tabletop, using ‘A Hundred Years of Blood and Horse Droppings’.
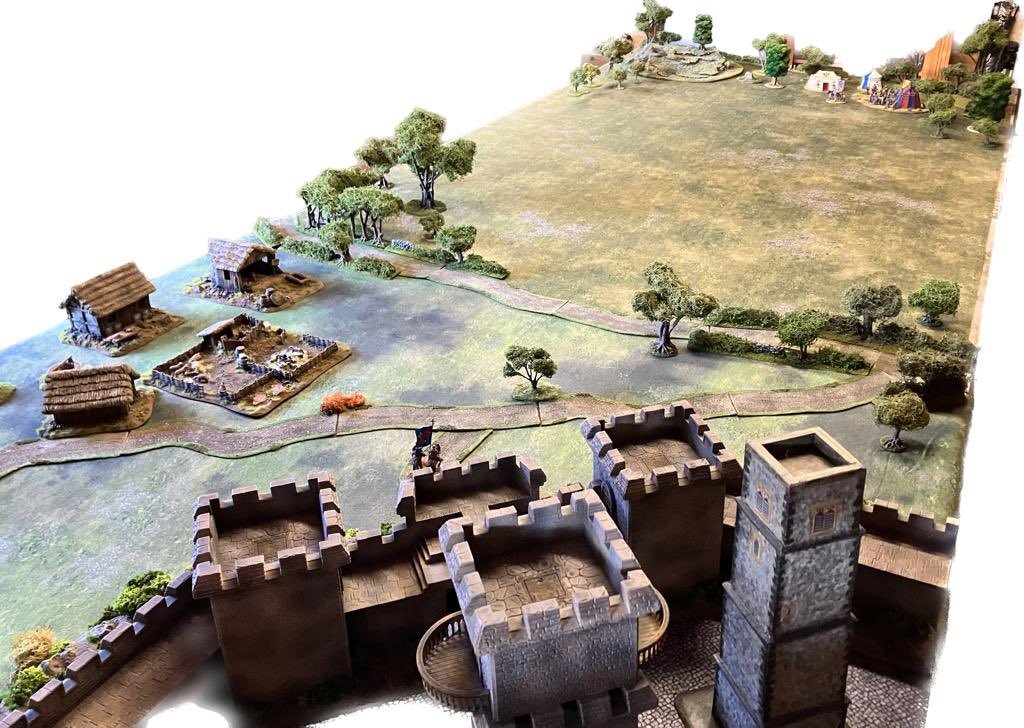
The battlefield, as imagined by Gareth Lane, for our re-fight. The castle and village at the bottom served as a deployment area for the French, adding some hollywood-esque interest to an otherwise uninspiring battlefield! (Photo courtesy Gareth Lane).
The Battlefield/Tabletop
Assuming you have the wargamer’s standard 6’ by 4’ table, and 28mm figures, the battle is fought along the length of it, with the English wards deployed in a line, one foot in from one narrow end. The French Companies are deployed at the other narrow end (we’ll talk about exactly how below).
The intervening table space should be open and flat. The woods of Agincourt and Tramencourt, are represented on either flank by areas of woodland 18” long, and 12” or so wide at the English table edge, tapering away towards the French, forming the classic funnel that was so important a part of the battle. This will count as ROUGH and OBSCURING terrain, as per the rules.
To reflect the difficulties the French faced traversing the muddied ploughland, between eight or so areas of ‘ROUGH terrain’ (perhaps represented by offcuts of ridged brown doormats, or simply pieces of brown paper), each about 12”x8”, should be laid out randomly across the centre of the table between the English and French armies.
The Forces

The ‘Herce’ Companies of Lord Camoys (left) and William Bouchier, 1st Count of Eu. Each Company comprises both archers and men-at-arms, is made up of Perry miniatures plastics, and has a footprint of 150mmx100mm. (Author’s photo).
The English
This is a relatively easy army to put together. By 1415 royal armies were entirely raised by indenture, contracts that specified exactly the troops required of the nobleman made up of companies of men-at-arms and archers. In my opinion, these component troop types would have continued to fight as a single company in close cooperation, rather than the archers being stripped out and placed under the command of men they did not know (and potentially could not understand), So, in ‘Blood and Horse Droppings’ these formations are represented by the ‘Herce Company’, named after Froissart’s famous (and obscure) description of English battlefield deployment looking like a herce (or harrow|).
As per the rules, the commanders of each ward, and other named notable captains, are an integral part of one of these Companies. The Captains’ Cards for the named figures are to be found as a link on the website. Those companies without a named captain will use a d6 Quality Dice.
All Companies should have a casualty rating of 5.
Van Ward
Duke of York (Herce Company)
Duke of Gloucester (Herce Company)
Herce Company
Main Ward
Henry V (Herce Company) Sir Thomas Erpingham (Herce Company)
Herce Company
Rear Ward
Lord Camoys (Herce C|ompany)
Herce Company
Herce Company
English Deployment
This is pretty straightforward. The three wards are placed side by side across the table, up to 12" from the table edge. In front of them, across the whole front, place stakes, each section the same width as a Company and a couple of inches deep. These count as LINEAR and FORTIFIED terrain (in other words they will halt movement, and may cause disorder to cross, and negate the Bonus an attacking Company would receive for charging or following up against a Company immediately behind them).
The only special rule that you will not find in the rules, is to reflect Sir Thomas Erpingham’s command of the archers. According to sources he rode in front of the army and gave the order for the first flight of arrows, calling ‘Now strike!’ and throwing his baton into the air. To represent this, the first shot of each English Company, no matter to which ward they belong, may automatically benefit from the ‘arrowstorm’ rule, without having to pass the usual Universal Test.
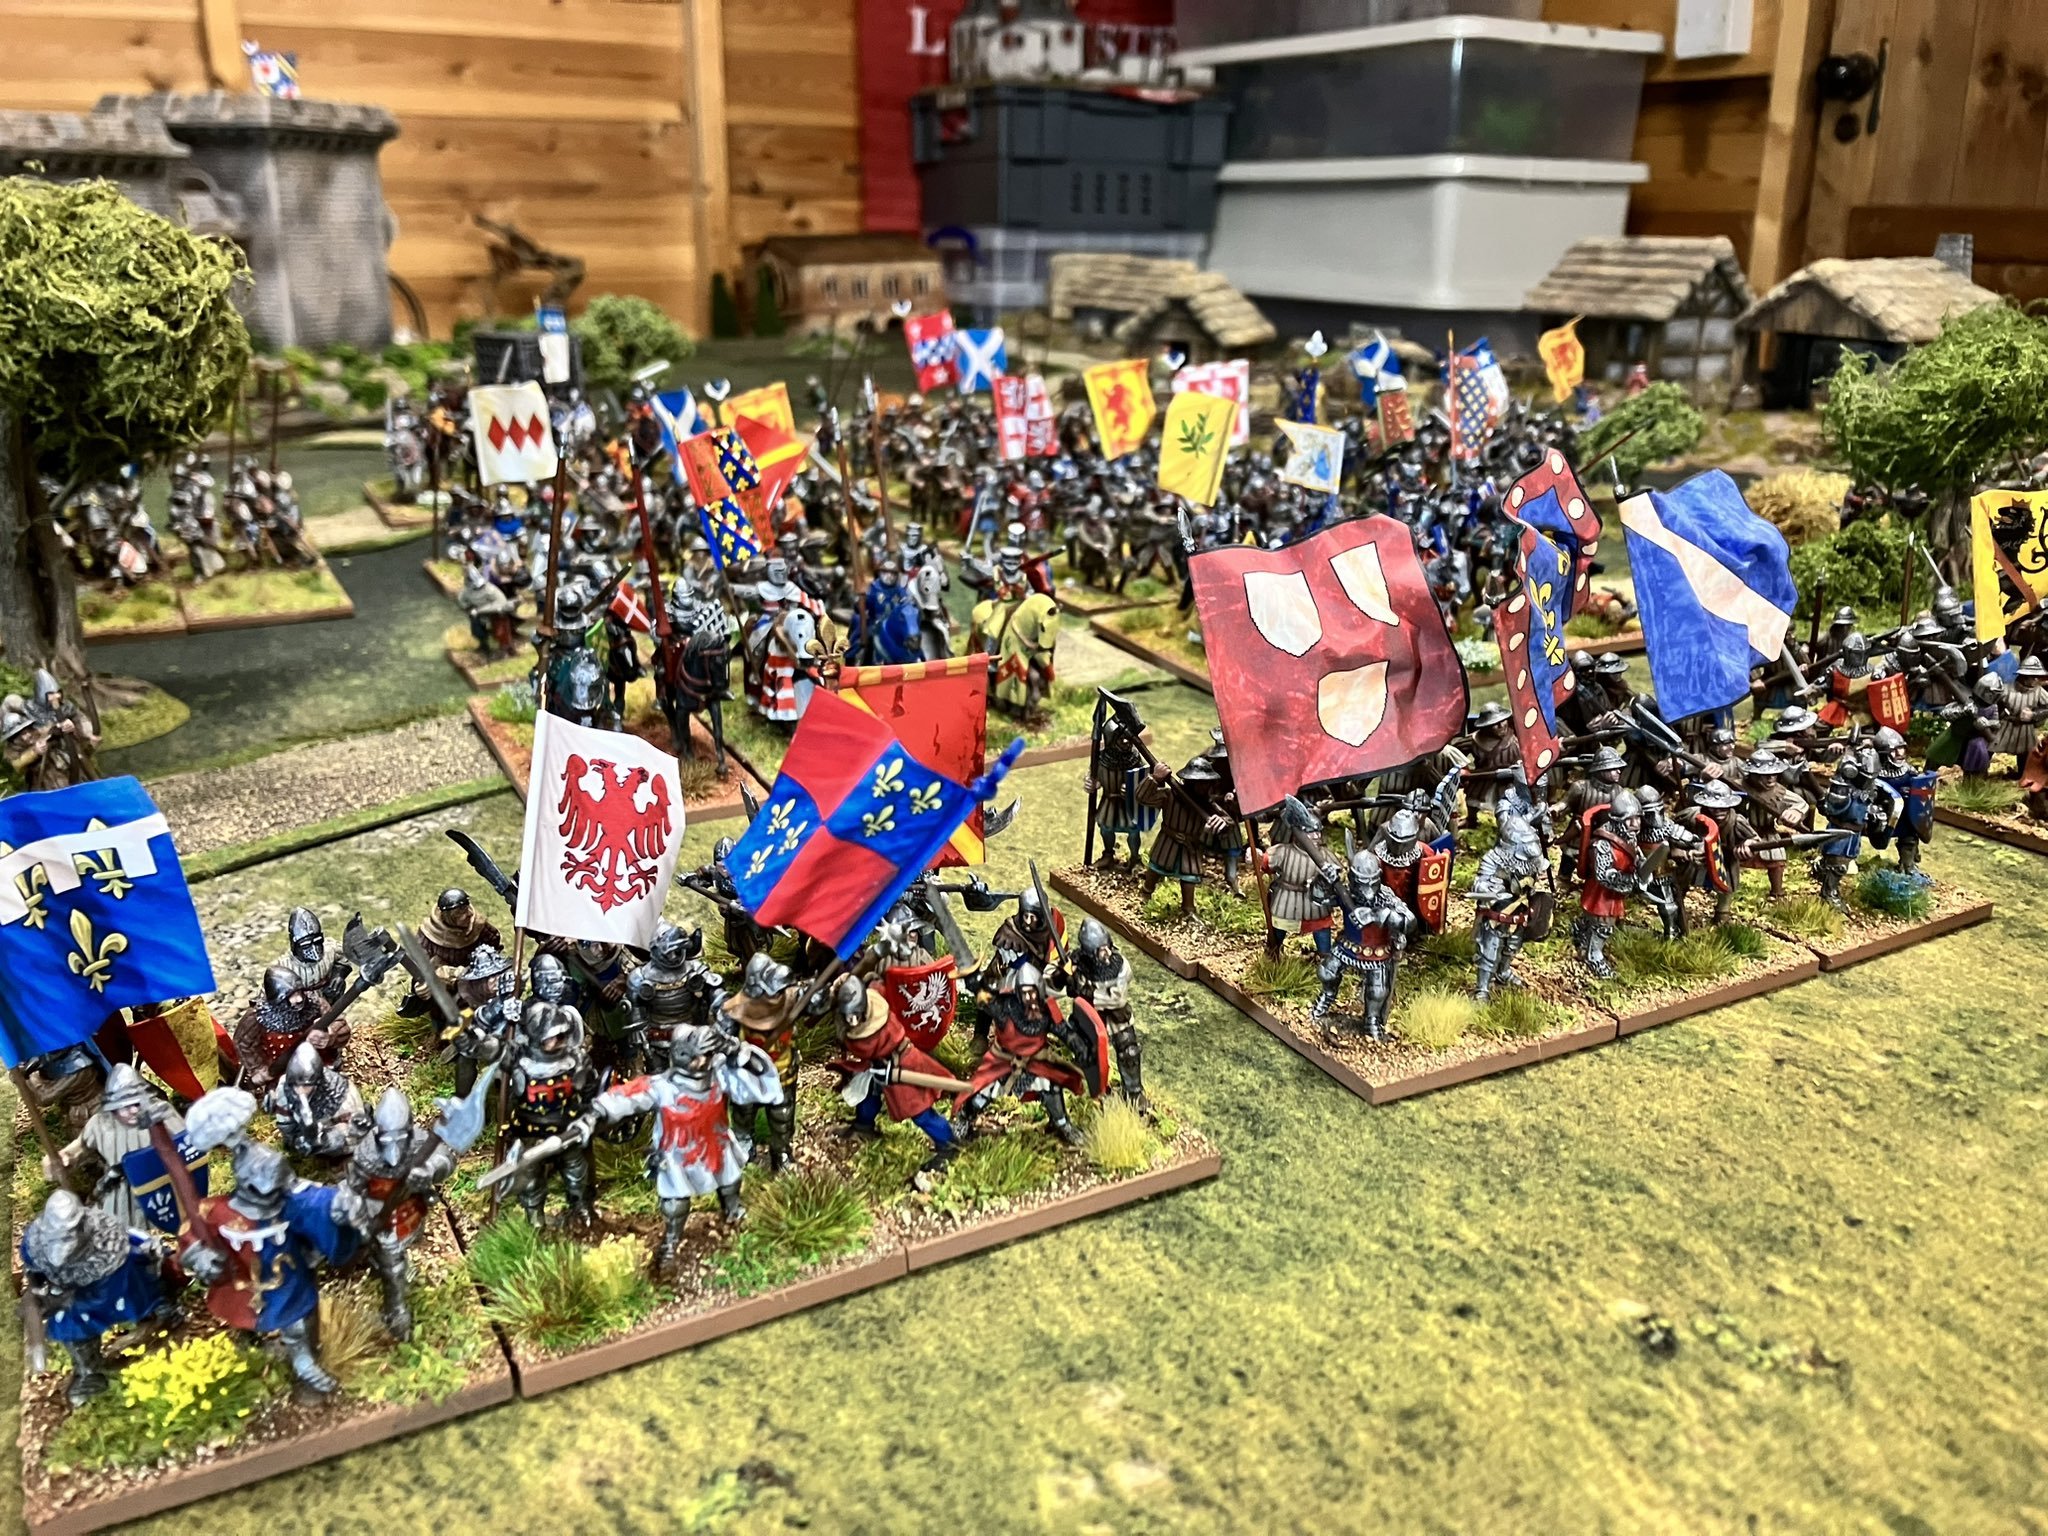
The French army assembled. Men-at-arms to the fore, with the great captains clamouring for the position of greatest gloire! Figures from Gareth Lane’s collection (photo courtesy Gareth Lane).
The French
The French force is slightly more diverse, with a mixture of mounted men-at-arms, dismounted men-at-arms, and then what the sources refer to as gens de trait, crossbows, archers, and spearmen from the various urban militias and professional companies (who, unlike the English, were raised and fought separately from the men-at-arms).
I would suggest the following combination:
Two mounted men-at-arms companies, the right flank company under Clignet, Admiral of France
Eight (dismounted) men-at-arms companies, including the French captains D’Albret, Boucicaut, d’Alençcon, and Bourbon
two crossbow companies, two bow companies, and two spear companies. The crossbows may have pavises (giving them extra defence against archery).
The Captains’ Cards for the named figures are to be found as a link on the website. Those companies without a named captain will use a d6 as a Quality Dice.
All Companies should have a casualty rating of 5.
Options for French Deployment
One of the reasons given for the defeat of the French army at Agincourt was their deployment. With the French nobles all clamouring for the honour of being in the vanguard, and of being amongst the first to engage the English, the cavalry, main and rear wards were left without any obvious leadership, and the gens de trait - the crossbows and archers - were left at the rear of the army, unable to participate.
For that reason, I would suggest that the French player should be allowed to choose between two possible deployments. They might decide to attack as the French did historically, and see whether the bravado and brute strength of the French men-at-arms can win through. If this is the option chosen then the crossbow, bow, and spear companies should be placed in the rear ward, with the mounted men-at-arms and the named captains and their companies in the van, and other men-at-arms companies making up the main ward.
Alternatively, they can follow a plan closer to that drawn up by Marshal Boucicault and Charles d’Albret, the week before the battle. This would see two companies of mounted men-at-arms, the companies of crossbows, and bows, alongside the men-at-arms companies of Boucicaut and d’Albret forming the van ward, with main and rear wards behind, comprising the remaining companies of dismounted men-at-arms and spears, with the other named commanders evenly distributed in each ward.
Whatever deployment option is used, the French army’s rear ward should sit against the table edge, with the main ward 8” in front of them, and the van 8” in front of the main.
The French attack on the Baggage
Arguably, from a wargaming perspective, the attack by a group of local knights on the English encampment had little importance. It may have encouraged Henry in his decision to order the execution of prisoners, and they may have stolen some jewels, crowns, and Excalibur (I’ve written about this incident here) but otherwise, they had no significant impact on the outcome of the battle.
Their appearance, however, will put extra pressure on the English player and, should things be going very badly for the French, help to even the odds.
To represent this attack, you can add a single Company of Serjans/Hobelars to the French force, with a strength of 3, to represent the local men-at-arms. They will appear on a successful Universal Test (taken using the senior French noble’s Quality Dice) on either the None or Vespers turn.

A Company of mounted men-at-arms, led by Marshal Boucicaut. Although an experienced commander, his relatively lowly birth made it hard for him to command the higher-born French nobles. Figures from Gareth Lane’s collection. (Author’s photo).
A Different Kind of Game
The third option for the French deployment changes the game somewhat. Here the players all take the part of the French, in a competitive game to win as much glory as possible. The French Companies are divided evenly among the players, with each getting a mix of mounted men-at-arms, dismounted men-at-arms, crossbows, bows, and spears. They are deployed side by side, and can put their Companies in whatever order they choose., with their rear ward on the table edge, and no more than 8” between it and their main, ward and no more than 8” between the main ward and their van).
The French players’ objective then becomes less about defeating the English, and more about acquiring as much personal glory as possible. They gain points for such achievements as:
having the first Company to engage the English in melee
being the first noble to personally take part in combat
fighting a melee against one of the English commanders (ranked 3 down to 1 for Henry, York, and then Camoys and the others)
Capturing one of the English Captains (ranked as above)
sacking the English baggage (with the option of extra points for finding ‘Excalibur’)
If you want to add an element of self-preservation, then halve the points if their captain doesn’t make it out of the battle alive.
The English forces can easily be run by the players collaboratively, so long as no one is forced to roll dice against themselves. (and even that needn’t be a problem, as any solo gamer can tell you). When a French player gets into melee, simply have one of the other players select the English tactical choice, and make any necessary Universal Tests.
Final Thoughts
I hope that this scenario will give an interesting, challenging, and fulfilling game. That is a big ask for any medieval wargame, and certainly for Agincourt in particular.
As always, the scenario is a suggestion, and players should choose to change things as they see fit. Add more captains (the French army was chock-full of noblemen, and the English had more experienced captains than those I have included here). If you feel that the English actually deployed blocks or wings of archers, separate from their men-at-arms then feel free to field the English as separate companies of men-at-arms and bows. It will certainly provide a different challenge to command, with more thought being needed to the sight-lines of the archers, and to how you will move your men-at-arms through the archers at the crucial moment.
Players should be able to do their own research and make their own choices to reflect how they read the battle. In the end, our understanding of medieval battles, and how they were fought, is patchy at best. Wargaming can offer us a different way of understanding what went on, even when we are really just playing with toy soldiers!